


Removing a cracked or stubborn screen protector can feel nerve-wracking. One wrong move and you risk scratching the expensive glass underneath or cutting your fingers on sharp edges. The safest approach starts with verifying that a protector is actually installed, then choosing the right non-metal tool and technique based on whether the glass is intact, shattered, or bonded with UV-cured adhesive.

Modern flush-fit protectors like those on the latest iPhone and Galaxy models sit so close to the frame that many people mistake the native display for a bare screen. Prying at the wrong surface can ruin water resistance or damage the actual glass. Taking a minute to confirm what you're working with prevents most common regrets.
How to Verify Your Screen Protector Before You Start
Run your fingernail gently along the speaker cutout or camera notch. If you feel a slight raised edge or step, a protector is present. Another quick check is to shine a light at a 45-degree angle across the screen. A real protector often creates a double reflection or faint border line that native glass does not. These tactile and visual cues matter most on devices with edge-to-edge designs where the protector blends almost seamlessly.
Skipping this step leads many people to gouge their actual display or compromise the factory gasket. If your fingernail glides perfectly smooth with no lip at all, stop and assume you are looking at the phone's own glass. In that case, the protector may have already come off or was never installed.
Essential Tools for a Damage-Free Removal
The single most important rule is to never use metal. Razor blades, knives, or screwdrivers will almost certainly gouge the display and strip away the oleophobic coating that makes fingerprints wipe away easily. That coating is hard to restore at home and changes how the screen feels for the life of the phone.
Instead, reach for a plastic card from your wallet, a guitar pick, or even a stiff piece of plain printer paper. These materials flex enough to slide underneath without concentrating force in one spot. Keep a roll of clear packing tape handy for shattered protectors and a spool of unwaxed dental floss for stubborn adhesive. A hairdryer on its lowest setting provides controlled warmth when needed, and 70% isopropyl alcohol with a microfiber cloth handles cleanup later.
The Shattered Glass Safety Protocol
When the protector has spiderweb cracks, the priority shifts from speed to containment. Lay overlapping strips of clear packing tape across the entire surface first. This seals the shards together so they lift as one piece rather than raining microscopic glass onto the real screen or your fingers.
Keep the lifting angle very low—under 15 degrees—and always start from a corner farthest from the worst impact point. Slide a plastic card or guitar pick slowly rather than trying to peel upward. The low angle stops loose shards from digging into the display below. Many people who skip the tape step end up with tiny scratches that only become visible under certain lighting after the new protector goes on.
If the protector is merely cracked in one or two places rather than fully shattered, you can often lift from an intact corner without tape, but the tape method remains safer when in doubt.
Removing Stubborn UV-Cured Glass (LOCA) Safely
Some aftermarket protectors, especially those sold in liquid adhesive kits, cure under UV light and create a bond stronger than standard sticky film. Vertical prying on these often shatters the protector or, worse, lifts the phone's own digitizer layer.
The safer route uses low heat and horizontal shearing. Set a hairdryer to its lowest speed and warm the edges for short bursts—no more than 30 seconds at a time. The surface should never feel hotter than what your bare hand can comfortably touch. While the adhesive is warm, slide a length of dental floss under one corner and work it back and forth in a sawing motion parallel to the screen. This shears the glue horizontally instead of pulling it upward.
The chart below shows the relative safety of different heat and motion combinations based on typical repair experience.
Safer Zone for UV-Cured Adhesive Removal
Low heat with horizontal sawing is the safer zone; vertical prying raises the risk of glass or digitizer damage.
View chart data
| Scenario | Low heat | Medium heat | High heat |
|---|---|---|---|
| Vertical prying | 3.0 | 2.0 | 0.0 |
| Horizontal sawing | 2.0 | 1.0 | 0.0 |
This pattern holds across most recent flagship phones. If the protector still refuses to budge after two or three warm-and-saw cycles, it is wiser to visit a professional repair shop than to escalate the force.

Special Considerations for Foldable Displays
Foldable phones use an ultra-thin flexible glass layer that punctures or delaminates far more easily than rigid displays. Heat is especially risky here because it can create permanent creases or bubbles in the folding area.
Samsung's own guidance recommends sliding a standard sheet of printer paper under the corner to gently lift the protector. The paper's thin yet stiff edge distributes pressure better than plastic cards and avoids concentrating force that could damage the flexible panel. Work slowly from the top or bottom edge rather than the folding crease itself. Never attempt the dental floss or hairdryer method on these screens.
If the protector on your Galaxy Z Fold or Flip shows any sign of lifting near the hinge, stop immediately. The delicate nature of these displays makes professional removal a lower-risk choice for many owners.
Cleaning Adhesive Residue Without Damaging Your Screen
Once the protector is off, a hazy layer of glue often remains. Apply 70% or higher isopropyl alcohol to a microfiber cloth rather than pouring it directly onto the phone. This prevents liquid from sneaking into speaker grilles, charging ports, or the side buttons. Wipe in gentle circular motions and avoid pressing hard enough to feel the screen flex.
The oleophobic coating that repels fingerprints is delicate. Aggressive scrubbing or harsh solvents can wear it down faster, leaving a surface that attracts oils and shows every smudge. If residue proves especially stubborn, a small amount of cooking oil left on for a minute can help loosen it, followed by a thorough alcohol wipe to remove the oil itself. Thorough drying with a fresh microfiber cloth prepares the surface for the next protector.
Preparing Your Device for a Fresh Start
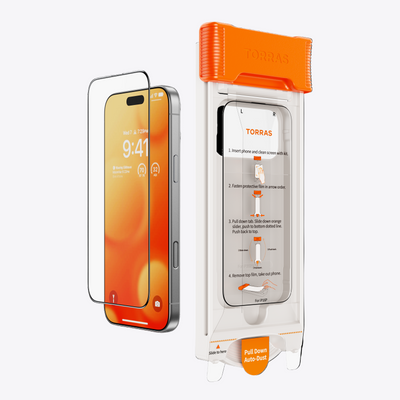
A clean, residue-free screen makes all the difference when installing a replacement. Work in a well-lit, dust-free area—preferably a bathroom after a hot shower so airborne particles settle. Line up your new GlassGo screen protector for iPhone 17 Series or GlassGo screen protector for Samsung S26 and follow the alignment guides carefully.
Many users regret rushing the install after spending so much effort on removal. Taking the extra minutes to ensure zero dust and perfect placement pays off in bubble-free clarity that lasts. If you frequently switch protectors or prepare phones for trade-in, keeping a small kit with the tools above saves repeated frustration.
For more on preventing future issues, read our guide on how to get air bubbles out of screen protector or learn how to keep your phone screen looking new with simple daily habits.
How Long Does It Usually Take to Remove a Screen Protector Safely?
Most intact protectors come off in under five minutes once you have the right technique. Shattered ones or those with UV adhesive can take 15 to 25 minutes when you include the tape, warming, and sawing steps. Rushing almost always leads to mistakes that take longer to fix than doing it carefully the first time.
Can I Reuse a Screen Protector After Removing It?
Almost never. Tempered glass protectors lose their precise fit and adhesive properties once lifted. Even if the glass looks undamaged, microscopic edge chips or stretched adhesive usually cause bubbles or lifting when you try to reinstall it. It is safer and cleaner to apply a fresh protector.
What Should I Do If the Screen Protector Cracks During Removal?
Stop immediately and add more packing tape over any new cracks before continuing. The tape keeps shards contained. Switch to an even lower angle and smaller lifting steps. If the cracks worsen dramatically, consider professional removal to avoid pushing glass dust into ports or under the frame.
Is Isopropyl Alcohol Safe for All Phone Screens?
Seventy percent or higher isopropyl alcohol is the standard recommendation from manufacturers when applied to a cloth. Avoid spraying it directly or using higher concentrations that can damage certain coatings over repeated use. Always wipe gently and dry thoroughly before installing a new protector.
How Do I Remove UV Glue Residue That Won't Come Off With Alcohol?
A tiny drop of cooking oil or even mayonnaise left on the residue for 60 seconds can break down stubborn spots that alcohol alone cannot touch. Follow immediately with an alcohol wipe to remove the oil completely. This combination works on older coatings where pure solvents sometimes fall short.
Will Removing the Old Protector Affect My Phone's Water Resistance?
As long as you avoid prying directly at the frame edges or forcing liquid into openings, water resistance usually stays intact. The biggest risk comes from mistaking the native glass for a protector and lifting at the factory gasket. The verification steps at the beginning of this article prevent most of that damage.

 New
New


Becca Farsace
Emmy-winning filmmaker and creator Becca Farsace takes tech outside. A former senior video producer at The Verge, she has created and produced over 250 videos, becoming the first staffer to surpass 6.5 million views on TikTok. Now a full-time tech creator, she's built a go-to YouTube channel for adventurous, real-world tech reviews. Becca blends cinematic storytelling with a sharp strategic lens to help brands and audiences connect with technology in a more human, compelling way.