


Applying a screen protector without bubbles seems straightforward until it is not. Dust, misalignment, and technique all affect the outcome, and most people run into the same avoidable mistakes every time. A clean installation is completely repeatable once you know what to fix and why.
Why Most Screen Protector Installations Go Wrong
Bad installations almost always come down to two things: surface contamination or alignment error. Both are preventable.
Dust, Static, and Surface Contamination
The most common cause of bubbles is not technique. It is dust. Even a single particle trapped between the screen protector and the display creates a visible bubble that the adhesive (the pressure-sensitive layer that bonds the protector to the glass) locks in permanently.
Static electricity makes this worse. Screens attract dust through static charge, so a surface you just wiped can start collecting particles again within seconds. Oils from fingertips count as contamination too, reducing adhesion quality wherever they land.
Misalignment and Installation Angle
Misalignment happens when the protector contacts the screen before it is correctly positioned, forcing you to lift and reapply. Every lift exposes the adhesive to new dust. Installation angle matters for the same reason: too steep, and air gets trapped under the leading edge. A shallower, more controlled descent lets air escape outward as the protector settles.

The Most Common Mistakes and How to Avoid Them
Most failed installations share the same handful of errors. Here is a quick reference for what goes wrong and the fix for each:
| Mistake | Why It Happens | How to Avoid It |
| Bubbles that will not smooth out | Dust trapped under the adhesive before or during installation | Use an alcohol wipe followed by a lint sticker immediately before applying |
| Misalignment on first contact | Eyeballing position with no physical guide | Use an alignment tool or installation tray to set position before any contact |
| New bubbles after reapplying | Adhesive picks up dust each time it is lifted | Work quickly; minimize the number of times the adhesive side is exposed |
| Edge lifting | Protector not flush against the screen's curved edges | Apply firm pressure along the edges; use gentle heat if needed |
| Smears under the protector | Fingerprints on the adhesive side before application | Handle the protector by its edges only; avoid touching the adhesive at all |
These five mistakes account for the vast majority of failed installations. Fixing even two or three of them dramatically improves results.
How to Prepare Your Screen for a Clean Screen Protector Installation
Preparation is where clean installations are won or lost. The actual application takes seconds. The preparation is what takes time and attention. Work through these steps in order before the protector touches the screen:
- Choose your environment carefully. Bathrooms after a hot shower work well because steam settles airborne dust. Avoid dusty rooms, areas near air vents, and anywhere with active airflow
- Clean the screen in layers. Start with the alcohol wipe included in most screen protector kits to remove oils and residue. Follow with the dry microfiber cloth to remove any remaining moisture and lint. Work from the center outward in single strokes, not circular motions
- Use the dust removal sticker. Most quality screen protector kits include a lint sticker for a final pass across the screen. This picks up particles the cloth leaves behind and is especially important near the edges where dust tends to collect
- Work fast after cleaning. Once the screen is clean, move directly to installation. Waiting gives static charge time to attract new dust
One more detail worth noting: do not breathe directly over the screen while working. Exhaled air carries moisture and micro-particles that land on the surface immediately.
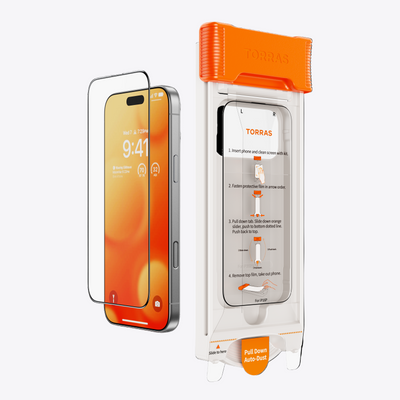
How an Alignment Tool Changes the Installation
Manual alignment is the hardest part of applying a screen protector without bubbles. Even careful positioning by eye allows small shifts between lining up the protector and releasing it. An alignment tool, also called an installation frame or installation tray, removes that variable entirely.
- Eliminates guesswork: The phone sits in the base, the screen protector loads into the frame, and it drops into the exact correct position without any eyeballing or last-second corrections
- Prevents the need to re-lift: Because alignment is locked in before contact, you avoid the repositioning cycle that introduces new dust onto the adhesive
- Keeps the adhesive clean: The tool handles placement, so fingers stay away from the adhesive side and avoid creating the low-adhesion smear zones that cause faint patches after application
- Repeatable results: Outcome no longer depends on steady hands or a precise release angle; the frame does the positioning every time
Screen protectors that include a dedicated installation frame take most of the difficulty out of the process before it starts.

How to Fix Bubbles After Applying a Screen Protector
Not every bubble means a failed installation. Knowing which ones will disappear on their own and which ones need intervention saves a lot of unnecessary frustration.
Bubbles That Disappear on Their Own
Small air bubbles near the center of a freshly applied screen protector often disappear within a day or two as the adhesive fully bonds to the glass. If a bubble is small, has no visible dust particle at its center, and is not near the edges, leave it alone and check again after 24 to 48 hours.
Bubbles Caused by Dust
If you can see a small dark speck at the center of a bubble, that is a dust particle. These will not resolve on their own. The only fix is to lift the protector, remove the dust particle, and reapply. Work carefully and quickly to avoid introducing new contamination during the process.
Edge Bubbles and Lifting
Bubbles along the edges of the screen protector are usually caused by the protector not sitting flush against the curved edges of the phone. Press firmly along the edge with a soft cloth or the squeegee card included in most kits. Applying heat from a hairdryer on a low setting for a few seconds can soften the adhesive and help it conform to the edge curve.
Persistent Center Bubbles
If a large bubble in the center of the screen does not resolve after 48 hours and shows no dust particle, the adhesive may not have bonded fully in that area. Firm, even pressure across the entire surface using a soft cloth often resolves this. If it does not, the screen may have had residual contamination that prevented proper bonding.

Apply Yours Cleanly and Confidently
A bubble-free screen protector application is not luck. It comes down to preparation, a clean surface, and the right tools. Clean the screen thoroughly before you start, use an alignment tool to eliminate positioning errors, and keep your fingers away from the adhesive side throughout. Screen protectors that include a built-in installation frame handle the hardest part for you, making a clean result the expected outcome rather than the exception. Get a screen protector with installation tool and make a clean, bubble-free result the expected outcome every time.
FAQs
Q1. What Is the Main Reason Screen Protectors Get Bubbles Even When Applied Carefully?
Most bubbles form because dust settles onto the screen or adhesive in the seconds between cleaning and application, not because of how the protector was pressed down. Static charge on glass surfaces actively attracts particles, so even a clean screen can pick up contamination almost instantly. Working in a low-dust environment and moving quickly from cleaning to application reduces this significantly.
Q2. Does the Type of Screen Protector Affect How Easy It Is to Apply Without Bubbles?
Tempered glass protectors are generally more forgiving than flexible film because their rigid structure prevents the material from flexing or shifting mid-application. Film protectors tend to curl and move during placement, which makes trapping air or dust more likely. Regardless of material, an alignment tool reduces installation difficulty significantly for both types.
Q3. How Do You Know When to Redo a Screen Protector Installation Versus Waiting It Out?
If a visible dust particle sits inside a bubble, waiting will not help; the protector needs to be lifted and reapplied. Significant misalignment is also worth correcting immediately while the adhesive is still fresh and easier to work with. Small, particle-free bubbles near the center are the only ones worth waiting on, since those often resolve within a day or two on their own.
Q4. Can You Reuse a Screen Protector If You Need to Reapply It?
Tempered glass protectors can usually survive one careful removal and reapplication if the adhesive has not been contaminated. Flexible film protectors are harder to reuse cleanly because the adhesive layer is thinner and picks up debris more easily when exposed. If the adhesive side picked up visible dust, gently dabbing the affected area with a piece of tape can lift particles without further damaging the adhesive layer. Reapplying quickly and minimizing air exposure gives the best chance of a clean result.


